Long Layered Haircuts: 30 Ideas That Actually Hold Their Shape
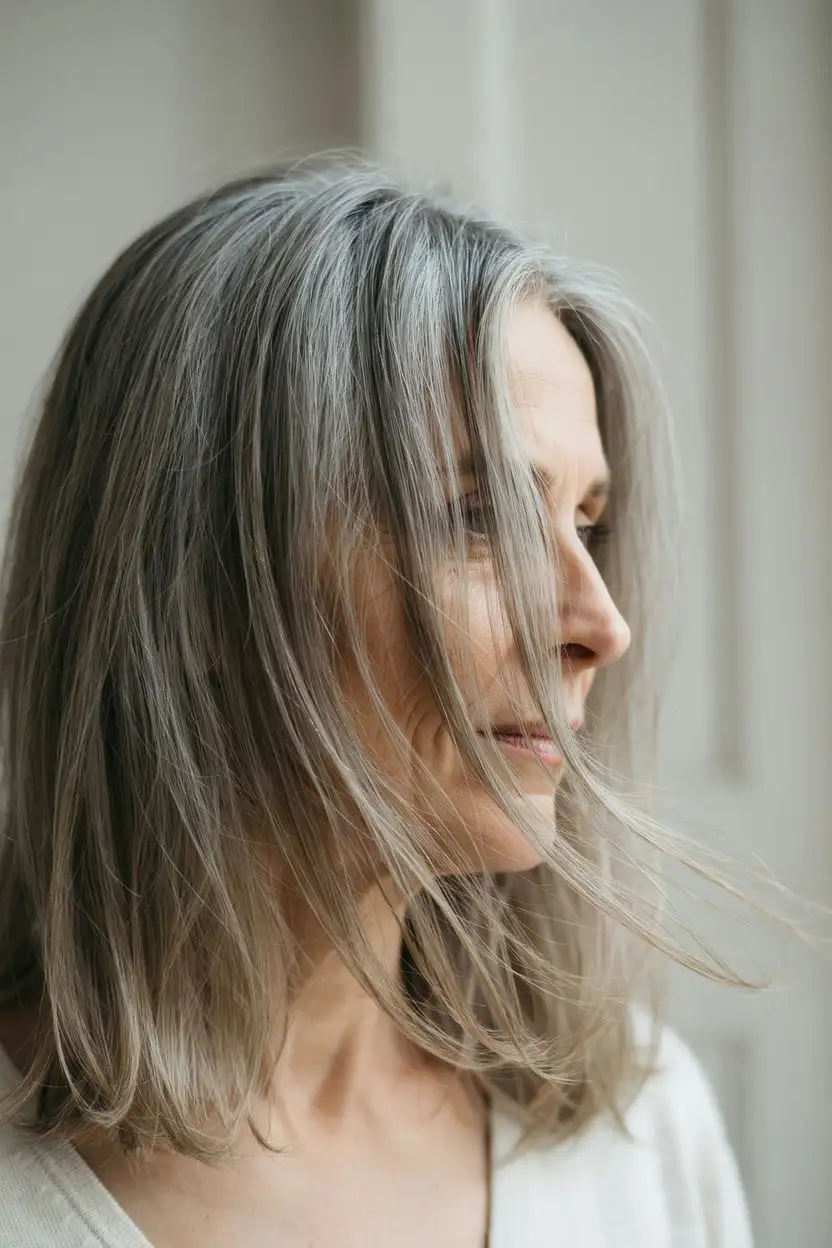
Long layered haircuts are the most requested cut I hear described wrong, because almost everyone asks for “long layers” like it’s one thing when the placement, the amount removed, and where it starts change completely depending on whether the hair is fine, thick, wavy, or straight. I’ve cut the same layer plan on two clients in one afternoon and watched it read as barely-there movement on one and a dramatic shape change on the other, and the difference was density, not the scissors. This list is grouped by hair type first, because that decides more about how a long layered cut will actually behave than any photo does. Pick your texture, then pick the placement that matches what you want it to do at week six, not just on the day you leave the chair.
The right long layered haircut depends on your hair’s density and texture more than the photo you’re bringing in — fine hair wants layers concentrated at the ends, thick hair wants weight removed through the mid-lengths, and curly hair wants layers cut dry.
Layered Haircuts for Fine Hair

Fine hair loses its sense of length fast when too much weight comes out of the middle. Keeping the bulk of the layering in the bottom third does the shaping work without thinning the hair into strands.
The Long Face-Framing Layer
Layers start at the cheekbone and run to the ends, leaving the back mostly blunt. This keeps the perimeter looking full while still giving movement around the face. At week six, the face-framing pieces have grown enough to blend into the rest, so the cut still looks intentional rather than grown-out.
Subtle Internal Layers at the Ends
Only the last two to three inches are layered, cut with a razor rather than shears for a softer edge. Fine hair holds this shape well because so little weight is removed. Ask your stylist to “keep the layers short, just in the last few inches” so they don’t thin the crown.
The Long Shag with Feathered Ends
Heavier layering starts around the chin and feathers out toward the ends, giving fine hair a fuller silhouette than a blunt cut would. Plan on a trim every 10 to 12 weeks to keep the feathering from growing into a flat, shapeless stage.
Curtain-Layered Ends for Fine Hair
The last four inches are cut into soft, curtain-style pieces that swing forward around the face. It photographs well from the front and still holds shape from behind, since the back stays largely uncut. Styling takes about 10 minutes with a round brush to set the swing.
The Barely-There Layer
A single, light layer removed only at the very ends, mostly to soften a blunt line rather than add real movement. Low-maintenance by design — a trim every 12 weeks is enough. At week six, this cut looks almost identical to day one, which is exactly the point if you want length preserved above everything else.
Long Layers with a Slight V-Shape Back
The back is cut to a soft point rather than straight across, which reads as more deliberate shape on fine hair than a flat perimeter. Viewed from behind, the V draws the eye down the center rather than across, making the ends look less thin than a blunt line would on the same density.
Long Layers for Thick, Heavy Hair

Thick hair carries enough bulk that layers need to start higher, through the mid-lengths, or the ends just sit heavy no matter how long they’re left. This is where most of the shaping actually happens.
Heavy Layer Removal Through the Mid-Lengths
Layers start around the collarbone and continue through the ends, removing significant weight from the interior. Thick hair needs this much taken out to move at all. Say specifically, “take the weight out of the middle, not just the ends,” since that’s the part most often skipped.
The Long Layered Shag for Thick Hair
Heavy, choppy layering throughout, starting as high as the jaw. This is the version built to move constantly rather than sit smooth. At week six, the shortest pieces have grown enough to blend, softening the choppiness into something closer to a classic long layer.
Face-Framing Layers to Cut Weight
Layers concentrated around the face remove bulk from the areas that frame it most, without touching the back much at all. This is a good middle option if you want the cut to feel lighter without a dramatic overall change. Expect a trim every 8 to 10 weeks to keep the framing pieces sharp.
Long Layers with a Deep Side Part
A deep part shifts most of the weight to one side, which on thick hair creates natural volume on the lighter side without any additional layering there. Combined with mid-length layers on the heavier side, it balances a head of hair that would otherwise sit evenly flat. By week six, the part has usually settled into the direction it wants to fall, which is worth confirming with your stylist before the cut rather than after.
The Thinned-Out Ends Layer
Point-cut ends only, with no interior layering — a low-maintenance option for thick hair that still wants some texture at the bottom. A trim every 10 to 12 weeks holds the shape without much upkeep in between.
Long Layers with a U-Shape Back
A rounded U at the back instead of a blunt or V line, which softens how much bulk shows at the ends when viewed from behind. Thick hair holds this rounded shape cleanly since there’s enough density to fill it out rather than looking thin at the edges.
Long Layers for Wavy and Curly Hair

Curl pattern changes how much a strand shrinks once it dries, so layers cut wet on curly hair can land in a completely different place than planned. Ask for a dry cut whenever curl pattern is involved.
Long Layers Cut Dry for Curl Pattern
The entire cut is done on dry, undisturbed curls so the stylist can see exactly where each layer will fall once it springs back. This is the single most useful sentence to say in the chair: “please cut this dry, I want you to see the curl pattern first.”
The Long Layered Curly Shag
Heavier, more irregular layering that works with curl clumping rather than fighting it. At week six, new growth softens the shortest layers into the rest of the shape rather than creating a visible line, which is part of why curly shags hold their character longer than straight ones.
Face-Framing Layers for Wavy Hair
Layers around the face are cut slightly longer than they would be on straight hair, accounting for the shrinkage waves show once dry. A trim every 10 weeks keeps the framing pieces from growing past the point where they still curve toward the face.
Long Layers with Diffused Ends
Ends are point-cut to break up any blunt line that would otherwise fight the natural curl shape. This is a lower-maintenance option for curly hair, since a slightly grown-out point cut still reads as intentional rather than needing a sharp line.
Deep Layers Through Curly Underlayers
Layering is concentrated underneath, leaving the top layer longer to control frizz and shape from the outside. This adds real volume without shortening the visible length, which matters if you’re not ready to see much length come off up top. At week six, the underneath layers have sprung back into their curl pattern fully, giving a truer sense of the finished volume than the day of the cut ever shows.
Long Layers with a Rounded Back for Curls
A rounded perimeter follows the natural curve curls tend to fall into anyway, rather than forcing a straight or blunt line the curl pattern will disrupt within a day. From behind, the shape reads as full and deliberate rather than uneven, which straight-line cuts on curly hair often struggle with.
Layered Haircuts With Curtain Bangs

Curtain bangs are really just an extension of face-framing layers, split down the center and cut to swing rather than lie flat. They work across nearly every texture once the layers underneath support the shape.
Long Layers with Classic Curtain Bangs
Bangs start around the cheekbone and blend into the rest of the layering, so there’s no hard line between the fringe and the sides. Say, “I want the bangs to blend, not stop at my eyebrows,” to avoid the too-short, too-separated version of this cut.
Curtain Bangs Blended into Face-Framing Layers
The bangs and the face-framing pieces are cut as one continuous layer rather than two separate sections. This holds up well past week six, since there’s no distinct bang line to grow out awkwardly.
Long Curtain Bangs with Minimal Layering
Bangs are the main event here, cut long and swept to the side, while the rest of the hair stays mostly blunt. Low-maintenance for the back and sides, though the bangs themselves need a trim every 4 to 5 weeks to hold their length and swing.
Curtain Bangs with Heavy Face-Framing Layers
Bangs blend into face-framing layers that reach all the way to the collarbone, creating a wide, dramatic frame around the whole face. This version needs the most maintenance on this list — a trim every 6 to 8 weeks to keep the framing sharp.
Short Curtain Fringe into Long Layers
A shorter fringe piece, ending around the brow, blends into longer layers below it. Viewed from behind, the shorter pieces at the front disappear entirely into the rest of the length, so the back reads as one clean long layer. By week six, the fringe has usually grown enough to sweep to the side on its own, extending the style before it needs its own separate trim.
Curtain Bangs with a Center Part and Long Layers
A center part lets curtain bangs fall symmetrically on both sides, which reads as more deliberate than an off-center part with the same bang length. Ask for the part to be cut in, not just parted that day, so it holds the symmetry through regrowth.
Face-Framing Layered Haircuts

Where a face-framing layer starts changes what it actually does. An inch higher or lower moves the eye to a different part of the face entirely.
The Classic Face-Framing Layer
Starts at the cheekbone and runs the full length, the most requested version of this cut. At week six, the shortest pieces have grown to around jaw length, which still reads as intentional framing rather than a stage to get through.
Long Layers Framing the Jaw
Layers start right at the jawline instead of the cheekbone, drawing more attention to that horizontal line. This suits anyone who wants the framing subtler and less concentrated near the eyes.
Face-Framing Layers Starting at the Cheekbone
A slightly higher starting point than the classic version, closer to the top of the cheekbone, which shortens the framing piece and draws the eye upward rather than down toward the jaw. At week six, this piece has grown down to roughly cheekbone level, so it keeps working even as the rest of the cut settles.
Long Layers with a Single Face-Framing Piece
Just one piece on the dominant side rather than framing both sides evenly. This is a smaller commitment than a full face-framing layer and easier to grow out if you change your mind — ask your stylist which side you part toward most before deciding which side gets the piece.
Face-Framing Layers for a Round Face
Layers start below the cheekbone, around jaw level, adding vertical movement rather than width at the widest part of the face. This creates length along the sides instead of drawing extra attention to where the face is already fullest.
Face-Framing Layers for a Long Face
Layers start higher, around the cheekbone or slightly above, adding width and movement partway up rather than letting the eye travel the full length uninterrupted. Face shape is a guideline here, not a rule — density and how much you want to style each morning matter just as much as bone structure.
Choosing the Right Long Layered Cut for Your Hair
| Hair type | Where layers start | Trim cadence | Who it suits |
|---|---|---|---|
| Fine hair | Bottom third only | 10–12 weeks | Anyone wanting to preserve length and fullness |
| Thick hair | Mid-lengths or higher | 8–10 weeks | Anyone whose ends currently sit heavy and flat |
| Wavy/curly hair | Cut dry, varies by curl pattern | 10 weeks | Anyone whose curl pattern isn’t being respected by current cut |
| Curtain bangs | Cheekbone, blended into layers | 4–8 weeks (bangs) | Anyone wanting a dramatic frame without cutting length |
If you only remember one thing from this list, remember that fine hair and thick hair need layers placed in almost opposite locations to get the same result. Bring a photo, but lead the conversation with your actual density, not the picture.
The layer placement that works on your friend’s hair can do the opposite on yours. Density decides more than the photo does.
What to Say Before You Sit Down
- “My hair is [fine/thick] and I want the layers to start at [collarbone/jaw/cheekbone].”
- “I have about 10 minutes to style this in the morning.”
- “Can you cut this dry so you can see how it actually falls?”
- “How will this look at week six, and how often do I need to come back?”
Bring at least one photo showing the back of the cut you want, not just the front. Long layers are built through the back and sides as much as the face-framing pieces, and that’s the part most people forget to show their stylist.
Frequently Asked Questions
Do long layered haircuts work on all hair types?
Yes, but the placement has to change. Fine hair needs layers concentrated at the ends; thick hair needs weight removed higher up. The same layer plan applied to opposite textures produces opposite results, which is the most common reason a “long layers” request goes wrong.
How much length do you actually lose with long layers?
Very little at the very ends — most of the visible length stays intact, since layering removes weight through the interior rather than shortening the overall length. The longest pieces typically stay within an inch of your starting length.
How often do long layered haircuts need a trim?
Most versions on this list hold their shape for 8 to 12 weeks, depending on how much layering and face-framing is involved. Curtain bangs are the exception, usually needing a trim every 4 to 6 weeks to keep their swing and length.
Can I get long layers if I have curly hair?
Yes, and it’s one of the best places for it — curl pattern actually benefits from the movement layers add. Ask for a dry cut specifically, since curly hair needs to be cut in its natural, sprung-back state to land layers correctly.
What’s the difference between long layers and a shag?
A shag is a more aggressive, choppier version of long layers, usually starting higher and cut with more texture throughout. Long layers are generally smoother and more blended, with less contrast between the shortest and longest pieces.
Picking One Before Your Appointment
Match your texture to a group above before you match a photo. That single decision determines more about how this cut actually looks in six weeks than anything else on this list.
Tell me your hair type in the comments and I’ll help you land on a starting point. — Viv